Tutorials
1 MUFIS Tutorials
Now you have Blender and MUFIS installed in your computer, it is time to learn how to use it. In this section, you will find a series of tutorials that will guide you through the process of simulating muscle fibers in a 3D model.
1.1 Prerequisites
In order to simulate the growth of muscle fibers in a 3D model, you need to have a 3D model of the animal you want to simulate. There are many online repositories where you can find 3D models of animals, such as Sketchfab, TurboSquid, CGTrader, among others. However, since we are interested in solving a scientific problem, we need to make sure that the 3D model is accurate and that it has the necessary details to simulate the muscle fibers. For this reason, I recommend using the 3D models available in the MorphoSource repository, the DigiMorph repository, or the Smithsonian X 3D repository, etc. Check our full list of recommended repositories here.
Since we are simulating a biomechanical process, it is important to have two models. For example if we are interested in simulating the bite of an animal, we need the skull and the mandible. If we are interested in simulating the movement of the legs, we may need the femur and pelvis or the femur and tibia, etc. In the case of paleontological studies, a common situation is the absence of material, in this case, we can use the models of the closest living relatives of the animal we are interested in, but we must be aware that the results may not be accurate if we decide to use this approach.
1.2 Importing the 3D Model
In Blender it is possible to import 3D models in different formats, such as .obj, .fbx, .stl, among others. You are free to use the format that best suits your needs, but I recommend using the .obj format, as it is widely used and supported by most 3D modeling software.
Once aquired the model you need to import it into Blender. To do this, follow these steps:
- Open Blender.
- Delete the default cube, light, and camera by selecting them and pressing
Xand thenEnter. This is an importat step if you are interested in exporting the simulation as an image or video. Otherwise, the default camera will be used to render the scene.
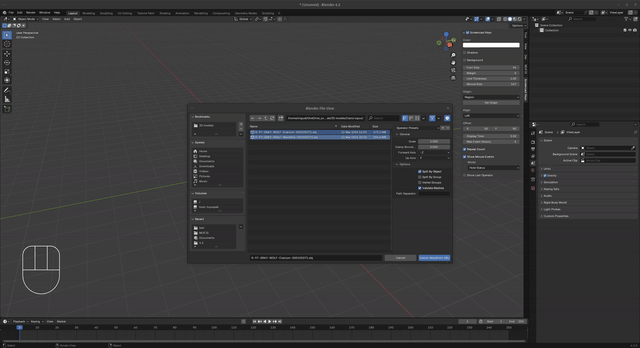
- Go to
File > Import > Wavefront (.obj). - Navigate to the folder where the 3D model is located and select it.
- Click on
Import OBJto import the 3D model into Blender.
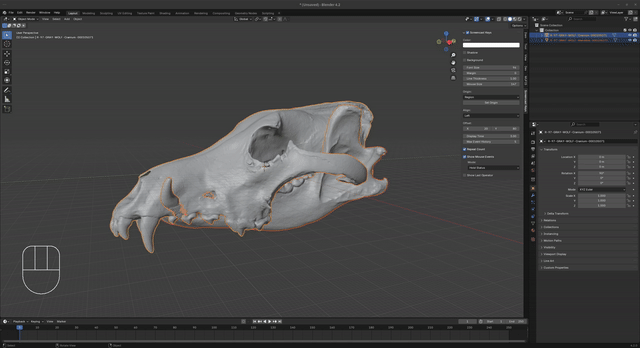
- Now we need to align both models to an anatomical position. To do this, select the imported model and press
Gto move it,Rto rotate it, andSto scale it. You can also use theMove,Rotate, andScaletools located in the left panel of the 3D view.
With the model imported, we have to decide if we are interested in simulating the muscle fibers growth or if we want to estimate the bite force of the animal. In the first case, the size of the models are not important, but in the second case, the size of the model must be accurate to the real world size of the animal.